
Coco Chanel Inspired
Drinking Straw Necklace
The face and style of Coco Chanel subtly entice in this bold neckpiece.
Drinking Straw Necklace
The face and style of Coco Chanel subtly entice in this bold neckpiece.
Dress it up, or dress it down, YOU are what makes it glamorous!

Materials
In
this craft, as with any, your results can vary as much as your
materials and imagination. I will offer you guidance based on the exact
materials that I used.
10 black drinking straws
(the hostess at California Pizza Kitchen was kind enough to donate for a craft project)
Triple Thick Glaze
foam brush
jewelry chain
(approximately 20 inches for necklace base, 50 inches for beading straws)
lobster clasp (1)
jump rings (33),
head pins (50)
pearl beads (22)
white seed beads
bead caps or bead dividers
(must have larger diameter than straws, with hole smaller than seed beads)
clear gift wrap tape
scissors
small round nose pliers
needle nose pliers or wire cutters (not shown)
ruler
pen/pencil
paper for sketching guidance (not shown)
Small square of floral foam or styrofoam for drying glazed straws (not shown)

Instructions
This craft
starts out very similarly to the Drinking Straw Bracelet of Paper Crafting 101,
but alternate tips and ideas are offered here. This gorgeous necklace has a lot
of steps, but I will break it down into easy to follow sections.
A. Sketching
B. Wrap
and Glaze Straws
C. Measure
and Cut
D. Making
Straw Beads
E. Attaching
Beads and Finishing Touches
F. Alternate
Styles and Ideas
-->
A. SKETCHING
I did a lot of sketching before coming to a final concept. I’m no sketch
artist, but was able to work out the logistics and engineering to be prepared
in purchasing supplies. This was my final sketch. I used it to figure out bead
numbers, design, length, etc. It was my base for the whole project.

B. WRAP AND GLAZE STRAWS
1. Wrapping the straws begins with cutting. The Coco Chanel Skinny Tags
offer a perfect size and guides to start cutting. Just cut around the edges to
for long triangles. I used two sheets (10 tags each), to end up with 20 paper strips.


3. Use two paper strips per straw, and try to butt them up against one another to save straw space as well as saving you steps cutting after the glaze has dried. Continue until all paper strips have been attached.


6. Using your fingers,
carefully roll the paper tightly around the straw. These skinny tags are
slightly more difficult than doing a longer strip of paper. Watch your edges
and keep them tight.


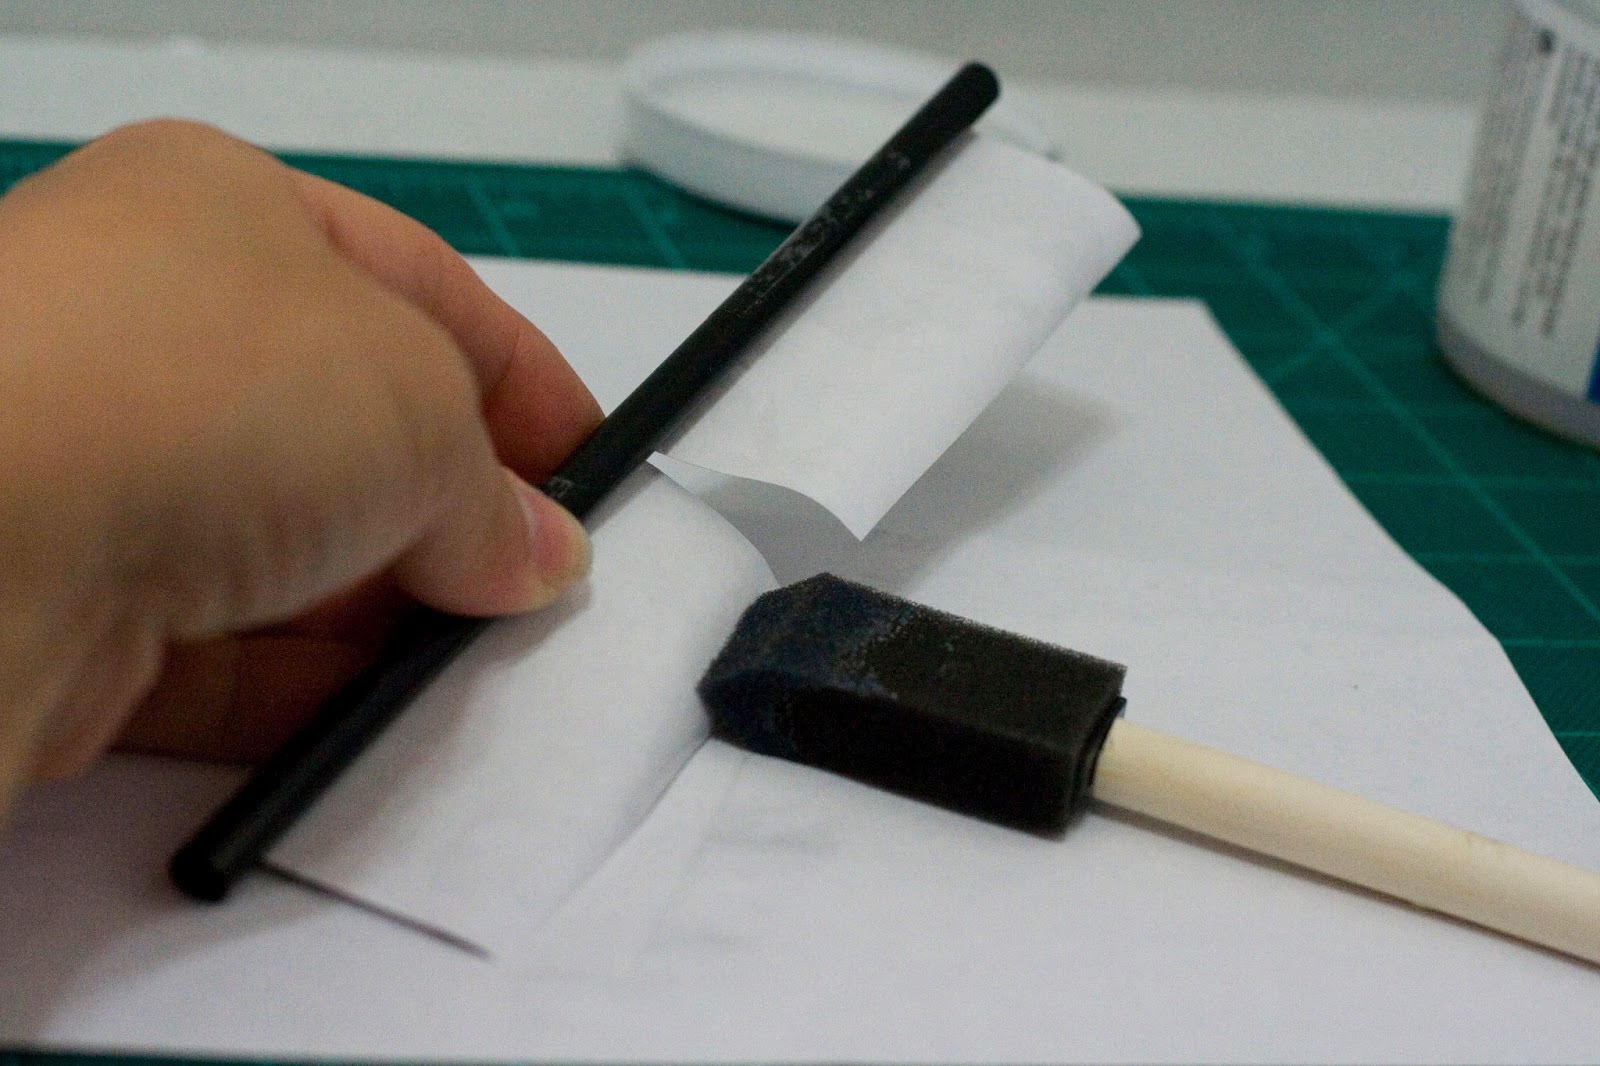
--> 1. Once the glazed straws have dried completely, cut each paper strip section from the straw. Trim the ends, and cut at the seam. It’s okay to trim some of the paper off. It will offer a more clean cut, and you will ultimately be cutting them down to size for the necklace.

--> 2. Okay, bring out your sketching!! It’s time to cut your paper straws into beads. I diagrammed my sizes to use as a template and follow as I cut. The full length of the paper strip is 9mm, so I used that as my center bead and base measurement. I went down by .5mm increments from there, down to 1mm. This allots 16 beads on either side of the 9mm center bead.

--> 3. Measure each increment from 1mm to 8.5, mark, and cut. This is where you end up with options. You will be choosing which photo beads will lay next to each other, as well as which end and where to cut. The more choosey you are with your cutting, the more you may want to plan in advance and make more paper-wrapped straws to accommodate your photo preference. Most of my beads have the face of Coco Chanel in them, but others are the, uh…short straws and have only abstract patterns of her lower body, dress, pearls, etc.

--> 4. As I cut, I laid my pieces on my diagram sketch to keep myself organized.

5. This is my final cut station with all my beads and mess!

D. MAKING STRAW BEADS
--> 1. In this necklace, there are three bead types. I have deemed them, 2-pearl, 1-pearl and no-pearl. The straws can organize themselves by size, but not by bead type. I marked my diagram (based on my sketch) which straw would become which bead type (marked as "0", "1", or "2"). I then separated them into small containers. This way, I can simply create each of the bead types in batches and not mix up which size is which bead type.

--> 2. This entire section requires a lot of headpin loops. If you are not familiar, you may want to practice on some loose headpins. Rounded nosed pliers work best, but standard needle nose pliers from the tool box work, it just may not be as "pretty". You will need something to cut the wires too though. This is a headpin loop. There are photos following with live details.


4. I started with the 2-pearl beads. I figure they are the hardest and most difficult, so it can only get easier from here! I sketched a diagram of each bead type to allow for greater ease in engineering each bead as I am building them.
 Order of Findings:
jump ring
headpin loop
seed bead
pearl
bead cap/spacer
headpin loop
chain|
|
chain
headpin loop
|
bead cap/spacer
pearl
seed bead
headpin

Materials Used in One 2-pearl Bead
1 jump ring
1 cut wrapped straw
2 pearl beads
2 seed beads
2 bead caps/spacers
2 headpins
chain, approximately 1mm less than straw
1 jump ring
1 cut wrapped straw
2 pearl beads
2 seed beads
2 bead caps/spacers
2 headpins
chain, approximately 1mm less than straw
5.
String the headpin with the seed bead first, then the pearl bead, then
the bead cap. Trim half the headpin. You may be able to use the other
half on the opposite end if you keep your loops tight and allow wiggle
room with your length of chain.
The
next 8 steps apply to both the 2-pearl bead and the 1-pearl bead, with
the exception being in THIS STEP, omitting the pearl bead. A sketch will
be provided in Step 13.

6.
Attach one end of the chain with a headpin loop. With some of the short
beads, no chain is necessary, and the really short ones can be
completed with a single headpin.

7. Slide the second headpin or leftover piece through the last link on the attached chain.

8. Secure the headpin to the chain with a headpin loop. Trim the head off the pin.

9. You now have the chain length that will hold the bead on to the necklace chain.

10. Thread this piece through the straw. The bead cap should be large enough here to NOT go through the straw (you might want to take a straw with you to the store when choosing your bead cap!).

11. Now add the top embellishments for the bead.

11. The final step for this bead type is to secure all of the pieces by ending with a headpin loop. Pull the wire taut to help keep the beads secure. If you pull too tight, the straw will bend under pressure, or you can bread beads when creating loops, as well as breaking the headpin. Worse case, you just re-string it!

12. Continue Steps 5-11 for the rest of the 2-pearl beads. The 1-pearl beads are the same with the exclusion of the bottom bead. I got excited and attached my center bead, but I will discuss that in Section E.

13. Continue Steps 5-11 for the rest of the 2-pearl beads. The 1-pearl
beads are the same with the exclusion of the bottom bead.

Order of Findings:
jump ring
headpin loop
seed bead
pearl
bead cap/spacer
headpin loop
chain|
|
chain
headpin loop
|
bead cap/spacer
seed bead
headpin
jump ring
headpin loop
seed bead
pearl
bead cap/spacer
headpin loop
chain|
|
chain
headpin loop
|
bead cap/spacer
seed bead
headpin
 Materials Used in One 1-pearl Bead
1 jump ring
1 cut wrapped straw
1 pearl bead
2 seed beads
2 bead caps/spacers
2 headpins
chain, approximately 1mm less than straw
13. Using Steps 5-11, thread the 1-pearl beads. Here is a visual of the thread and final bead.

14. Now we will create the final bead type, the no-pearl bead.

Order of Findings:
jump ring
chain|
|
|
|
|
|chain
headpin loop
|
bead cap/spacer
seed bead
headpin
jump ring
chain|
|
|
|
|
|chain
headpin loop
|
bead cap/spacer
seed bead
headpin

Materials Used in One 1-pearl Bead
1 jump ring
1 cut wrapped straw
1 seed beads
1 bead cap/spacer
1 headpins
chain approximately length of straw
1 jump ring
1 cut wrapped straw
1 seed beads
1 bead cap/spacer
1 headpins
chain approximately length of straw
15.
As with 1-pearl beads, thread the seed bead and bead cap onto the
headpin. This time, keep the headpin long, depending on the bead length.
Ultimately, you don't want any headpin coming out of the top, and you
DO want a several chain links sticking out of the top. Thread the bead.


16. The finished no-pearl beads will be loose until they are attached to the necklace chain. These are my no-pearl beads and the resulting mess.

E. ATTACHING BEADS & FINISHING TOUCHES


2. Now that you have your center, lay the necklace down and arrange your beads in order.

3. Based on your bead and chain sizes, count out how many links of chain you need for the top of the no-pearl bead. Line up the tops of the straws (not the bead caps or pearl beads), pull the excess chain from the no-pearl bead, and count how many lengths you need (not including a jump ring) to reach the necklace chain. For me, it was three links. This number should be uniform across all no-pearl beads. Trim the excess links with wire cutters.

4. You will now attach the beads one at a time. The
1-pearl and 2-pearl beads attach with the headpin loop and a jump ring.
The no-pearl beads attach with a jump ring hooked on the last link of
the chain as seen below.

5.
Start attaching the beads working outward from the center. Attach the
beads to the necklace as close together as possible without creating an
overlap. There was not a perfect pattern for my chain (every other or
every three, etc.). I checked and eye-balled each one.

6. After bead number 33, you get a medal AND a cookie! You are ALMOST done! You just need to add the back closure. Put the necklace around your neck to measure size. I marked my measurements with masking tape. Cut the excess chain.

7. Use a jump ring to attach the lobster clasp on one end.

7. My lobster clasps came with larger jump rings, so I attached that to my measurement on the other end of the necklace. You could cut the excess chain, or leave it and add an embellishment. I
left the excess chain to offer an adjustable fit and used a headpin,
seed bead, and pearl bead to add a pearl dangle on the end.

ET VOILA!
 F. ALTERNATE STYLES AND IDEAS
Color palettes and styles are as endless as your imagination. Lorraine's Graphiques offer so many gorgeous color, print, and style options.


Fresh Spring Skinny
Digital Tags

Victorian Floral Skinny
Digital Tags

Create a matching set using the Drinking Straw Bracelet tutorial from Paper Crafting 101

No comments:
Post a Comment